
How To Create a Pattern in Illustrator Using Your Own Drawing or Painting
Welcome to EyeSavvy's first tutorial! We're all about incorporating art into design and today is all about how to incorporate your drawing or painting into a pattern. Let's get started!! You can either watch this video, or follow the steps below
Before We Start
download Adobe Illustrator
… let’s download it! (click here to start your 7-day free trial of Adobe Illustrator)
“But Kiki, why would I pay for Adobe Illustrator when I can use Canva for free?”
I hear this often. Many people do not want to commit to paying a monthly fee for Adobe Illustrator when they can just use Canva for free.
I get it! HOWEVER, the sky is the limit with what you can create in adobe illustrator vs. Canva.
In Canva, you are VERY LIMITED with the free version and a lot of people use the same design templates! The whole point of designing what you want is to stand out, right?
You can start with a 7-day free trial of Adobe Illustrator, and after this tutorial, if you decide you want to keep it, you can continue to pay the subscription each month.
Now, I have to be honest, the above link is an affiliate link but it’s cool because the more support I get from you by purchasing through this link, then the more time I’ll have to deliver some awesome free knowledge your way.
It's a win-win!
Now Let’s Start
1.) Scan your drawing
Scan your image at least roughly 2inx2in at 300dpi (Depending on how big or detailed you want your pattern to be.) Save your file as a jpeg or tiff.
2.) Edit The color of your image in photoshop
Bring your drawing or painting into photoshop and edit the color or the contrast by clicking on hue/saturation and/or levels under adjustments layers in the layers panel.
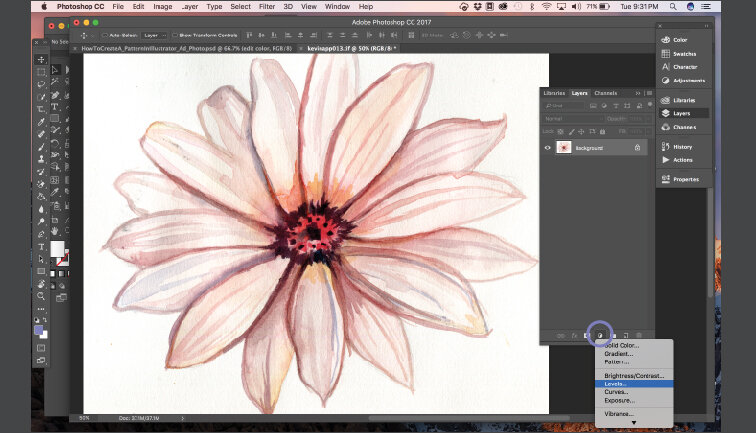
Once you've decided on the correct coloring and contrast, flatten your image by clicking in the top right corner of your layers panel and click flatten image.

3.) Remove the background
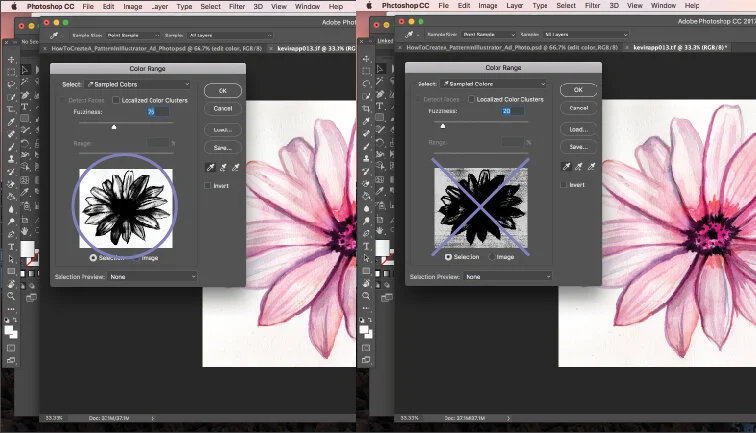
- In Photoshop > Go to Select > Color Range... and use the dropper tool to select the white background of your image.

- Use the slider under Fuzziness to get your image as dark as possible with the background remaining completely white.
- Hit ok.
- Click Select > Inverse - Make sure you have the quick selection tool selected.

- Click select and mask at the top.
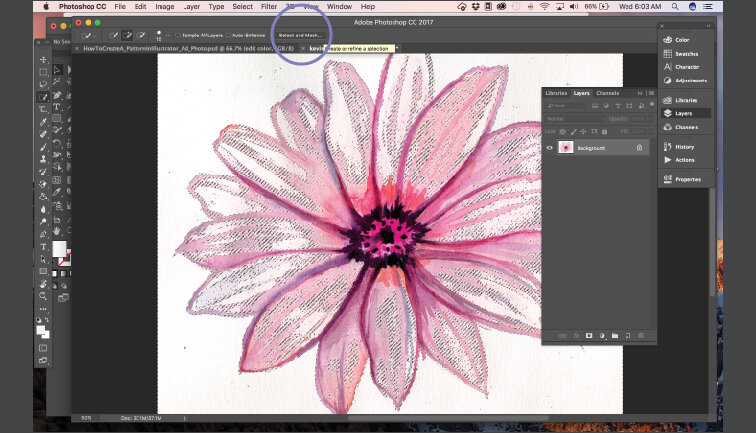
- Using the quick selection tool, start to bring in the white areas of your drawing or painting that you would like to keep (not the background).
- Play with the smooth, feather and contrast to get clear edges for how you would like your drawing or painting to be clipped, then hit ok.
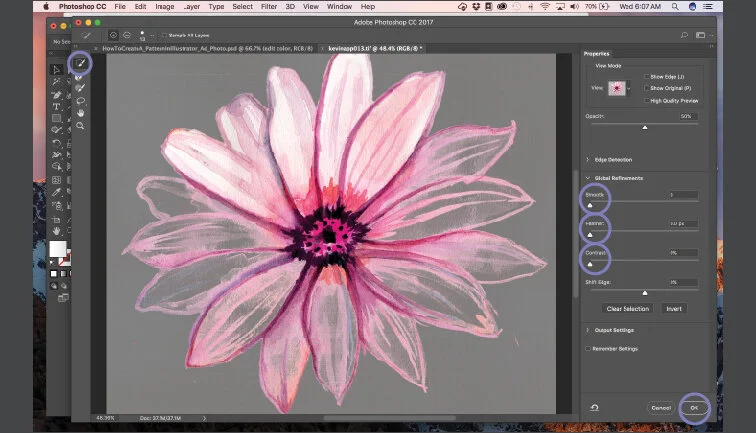
- Once you have your selection made, hit add layer mask in the layers panel to clip your image.
- Save your file as a .psd onto your desktop

4.) Bring your clipped drawing or painting into illustrator.
- Create a new illustrator file thats 8.5inx11in. Select Either CMYK or RGB depending if your going to use this pattern for web or print.
- Hit Create
- Click file > place... and select your clipped drawing or painting.

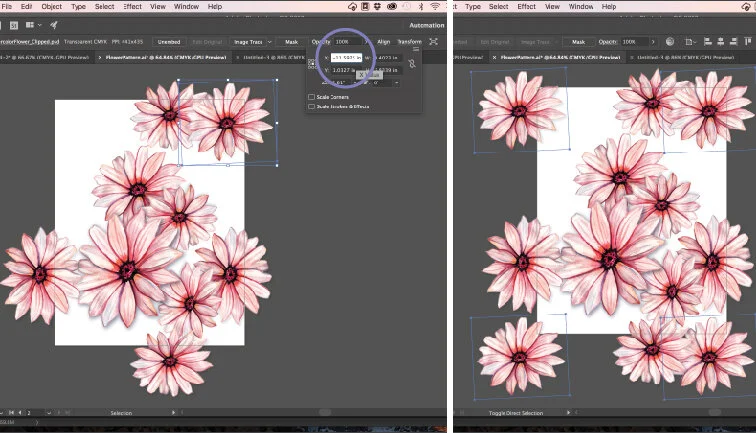
5.) Laying out your pattern
- Repeat your painting or drawing on your artboard however many times you would like to create your pattern.
For example: I took my watercolor flower, scaled it and rotated it many different ways to create variation.
NOW, here comes the semi-tricky part. You want the 8.5in x 11in border to be where your pattern is going to repeat on each side. If you have your drawing or painting in the corner it must be in the same place in every corner.
To make sure this is accurate:
- Select your drawing or painting in one corner, then copy and paste in place.
- Go to the transform panel and if you want to move your image to the left you need to change the x-axis.
- Go to the panel and click to the right of the numerical value and type +8.5. This will move it exactly 8.5 inches to the left. Do this for every corner or edge of your artboard. If the drawing or painting is hanging off the edge of one side, it must repeat on the other side.
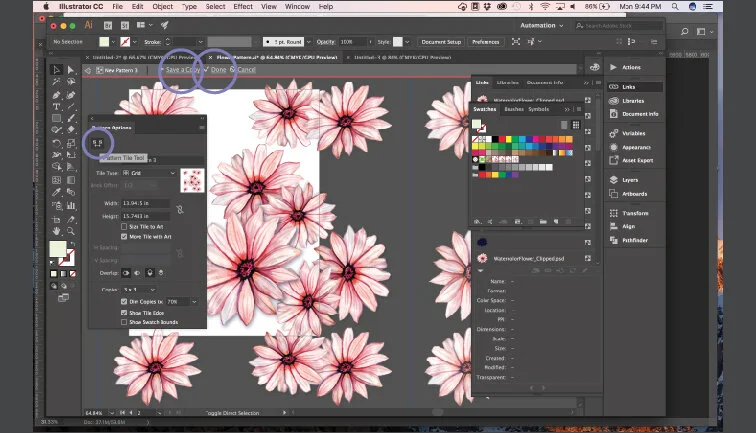
6.) creating your pattern
- Select everything on your artboard go to the links panel, click the icon in the top right corner, then click embedd image(s). A window will pop up, make sure you select flatten artwork into a single image.

- Keep everything selected and go to object > pattern > make. A window will pop up, hit ok.
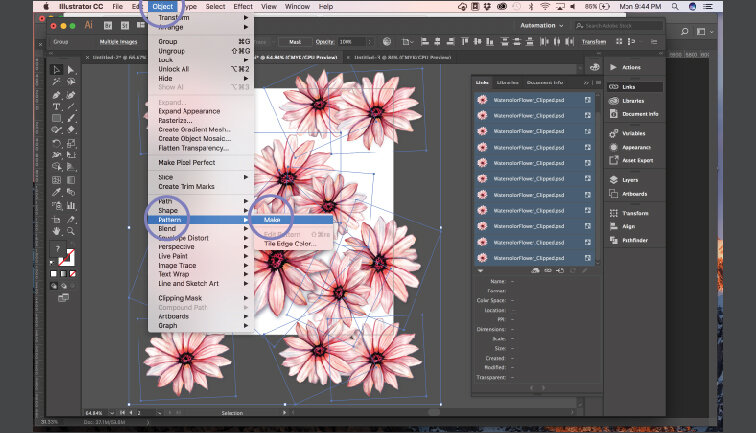
- The blue edge is where your pattern repeats, we want to shift that edge so that your edges remain the size of your 8.5inx11in artboard.
- Select the pattern tile tool and drag the blue edges to the edges of your 8.5inx11in artboard.
- Click save a copy > done.
7.) Voila! you have your pattern
Select your new pattern in your swatches panel and draw a box with your pattern swatch as the fill and see your beautiful seamless pattern in action. (I added a light yellow background as a separate layer behind).
